
📑 Table of Contents ▶
- Crispy Chicken Caesar Sandwich
- Crispy Chicken Caesar Sandwich Basics
- Fundamentals
- Preparation/Setup
- Mastering the Technique
- Technique
- Tips/Tricks
- Perfecting the Crispy Chicken Caesar Sandwich
- Perfecting Results
- Troubleshooting/Variations
- Serving and Storing Your Sandwich
- Serving/Presentation
- Pairings/Storage
- Conclusion
- FAQs – Crispy Chicken Caesar Sandwich
Growing up, I always loved helping my mom in the kitchen. One of my fondest memories was making crispy chicken Caesar sandwiches together. The crunch of the chicken, the zest of the lemon, and the creamy Caesar dressing made every bite a delight. These memories inspired me to create a recipe for this classic sandwich, which is now a staple in my own home.
As a busy mom, I know how important it is to have quick, delicious meals ready for my family. The crispy chicken Caesar sandwich is a perfect solution. It combines the classic flavors of Caesar salad with the satisfying crunch of breaded chicken, all nestled in a soft sandwich roll. It’s a meal that everyone loves, and it’s simple enough to prepare on a hectic weeknight.
Creating this crispy chicken Caesar sandwich recipe was a journey of trial and error. I wanted to achieve the perfect balance of flavors and textures. The key was in the seasoning and the technique of breading the chicken to perfection. This recipe captures all the elements I love about this sandwich, and I’m excited to share it with you.
Whether you’re a seasoned cook or new to the kitchen, this crispy chicken Caesar sandwich is a must-try. Its simplicity is its strength, making it a go-to meal for any occasion. Let’s dive into the details and create a memorable meal that will bring your family together.
Print
Crispy Chicken Caesar Sandwich
- Prep Time: 20 minutes
- Cook Time: 12 minutes
- Total Time: 32 minutes
- Yield: 4 servings
- Category: Main Course
- Method: Air Frying, Oven Baking
- Cuisine: American
Description
Discover how to make a mouthwatering Crispy Chicken Caesar Sandwich with this easy recipe. Perfect for a delicious lunch or dinner option!
Ingredients
- 4 (113 g each) thin uncooked boneless skinless chicken breast cutlets, (454 g total)
- 1 1/2 tablespoons all-purpose flour, (22 ml)
- 1/2 teaspoon salt, (2.5 g)
- 1/4 teaspoon black pepper, (1.25 g)
- 1/4 teaspoon garlic powder, (1.25 g)
- 1/4 teaspoon paprika, (1.25 g)
- 2 large egg whites, beaten
- 1 1/2 oz finely shredded Cheddar cheese, divided, (43 g)
- 1/2 cup plain panko breadcrumbs, (60 g)
- 1/2 teaspoon dried parsley flakes, (1.25 g)
- 2 cups chopped romaine lettuce, (140 g)
- 2 tablespoons (30 ml) light Caesar dressing, (I used Marzetti Simply Creamy Caesar dressing)
- 4 sandwich rolls or hamburger buns, (I used Martin’s Potato Sandwich Rolls)
- 1/2 teaspoon garlic salt, (2.5 g)
- 4 lemon wedges
Instructions
- Place the chicken cutlets in a mixing bowl. In a small dish, combine the flour, salt, pepper, garlic powder, and paprika. Sprinkle the seasoning mixture over the chicken cutlets. Mix well to ensure the chicken is evenly coated with the spices.
- In a shallow bowl, thoroughly beat the egg whites. In a separate shallow dish, mix together one ounce of the shredded Cheddar cheese, panko breadcrumbs, and parsley until well combined.
- Individually, take each seasoned chicken cutlet and dip it into the beaten egg whites. Let any excess egg drip off before pressing the chicken into the breadcrumb mixture, ensuring both sides are well-covered.
- For air frying (recommended): Arrange the breaded chicken cutlets in a single layer in your air fryer basket, ensuring they do not touch. Lightly spray the tops with cooking oil. Set the air fryer to 400°F and cook for 6 minutes. Turn the cutlets over, lightly spray again, and continue cooking for another 6 minutes until done. For oven baking: Preheat your oven to 425°F. Line a baking sheet with parchment paper. Once the chicken is breaded, place them on the sheet and lightly spray the tops with cooking oil. Bake for 8 minutes, flip them over, spray again, and return to the oven for an additional 8 minutes or until fully cooked.
- While the chicken is cooking, toss the chopped romaine lettuce in a mixing bowl with the remaining ½ ounce of shredded Cheddar cheese. Drizzle the Caesar dressing over the lettuce and mix thoroughly to coat.
- Lightly spray the cut sides of the sandwich rolls with cooking spray and sprinkle with garlic salt. Heat a griddle or skillet over medium heat, place the rolls cut side down, and toast for 1-3 minutes until they become golden and crispy. Remove from the pan.
- To assemble the sandwiches, place a cooked chicken cutlet on the bottom half of a toasted sandwich roll. Add about 1/3 cup of the Caesar salad mixture on top of the chicken. Squeeze a lemon wedge over the salad, then cover with the top half of the roll. Repeat this process to create four sandwiches. If not serving all at once, keep components separate and assemble as needed. Serve immediately.
Notes
- Add a sprinkle of grated Parmesan cheese to the breadcrumb mixture for extra flavor before coating the chicken cutlets.
- Consider adding slices of crispy bacon or avocado to make the sandwiches more filling.
- Use whole wheat sandwich rolls or lettuce wraps for a lighter option instead of traditional sandwich rolls.
Crispy Chicken Caesar Sandwich Basics
Fundamentals
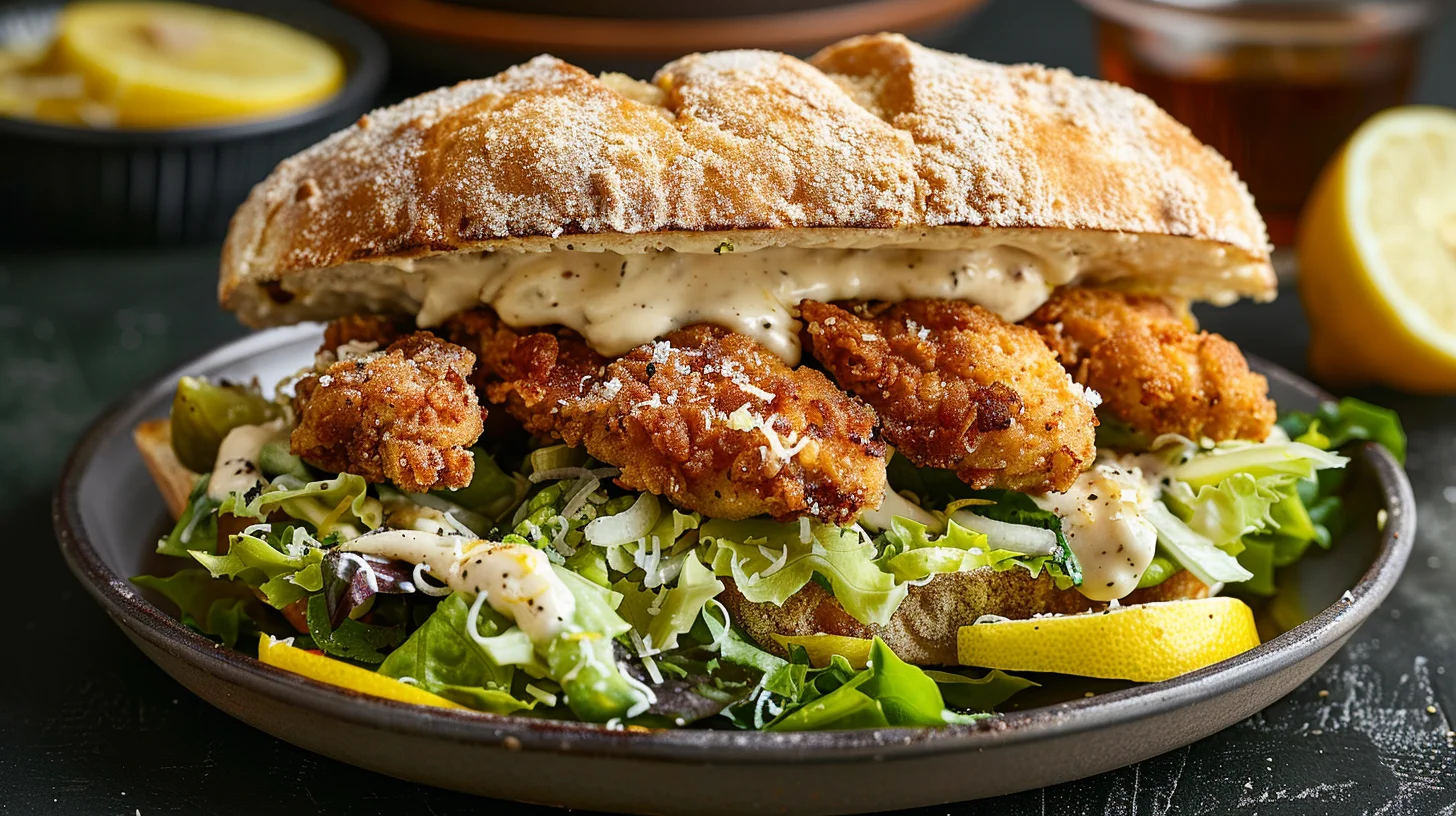
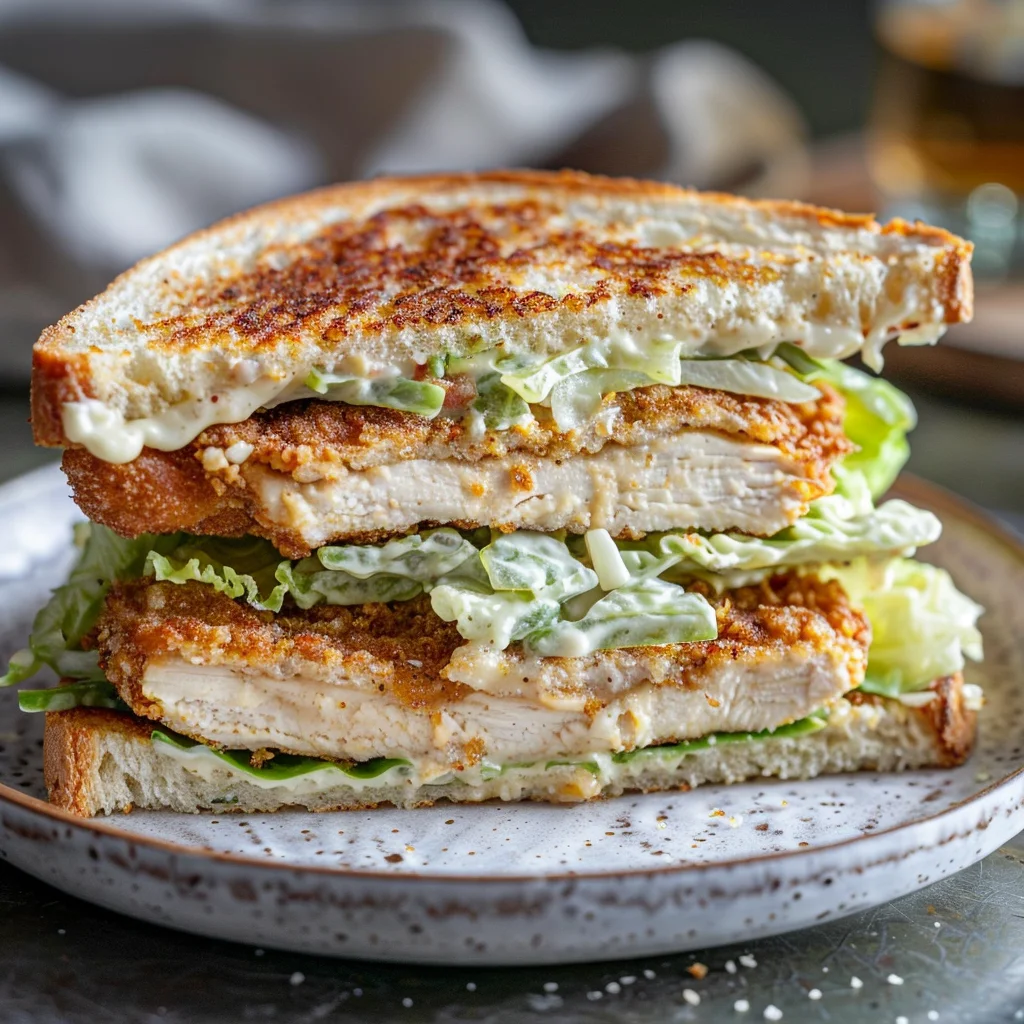
The crispy chicken Caesar sandwich is all about the balance between crispy textures and flavorful ingredients. The chicken cutlets serve as the star of the dish, providing a satisfying crunch that complements the creamy Caesar salad topping. The key to achieving the perfect crispiness lies in the combination of panko breadcrumbs and finely shredded Cheddar cheese.
Seasoning the chicken is crucial. A blend of flour, salt, pepper, garlic powder, and paprika ensures a flavorful base before breading. This combination of spices enhances the natural flavors of the chicken while adding a subtle kick of spice. For those who love experimenting, you might enjoy trying the Crispy Avocado Chicken Wonton Cups for more crispy chicken inspiration.
Preparation/Setup
Start by preparing your workspace. Gather all the ingredients, including the chicken cutlets, seasoning mixture, beaten egg whites, and the breadcrumb mixture. Having everything ready before you start ensures a smooth cooking process. To save time, you can pre-chop the romaine lettuce and mix it with the remaining shredded Cheddar cheese and Caesar dressing.
For the sandwich rolls, choose a sturdy option like Martin’s Potato Sandwich Rolls. Their soft texture complements the crunchy chicken, making each bite delightful. Lightly toasting the rolls with garlic salt adds an extra layer of flavor and prevents them from becoming soggy when assembled.
Mastering the Technique
Technique
The key to a perfect crispy chicken Caesar sandwich lies in the breading technique. First, coat each chicken cutlet in the seasoning mixture, ensuring an even distribution. Next, dip the seasoned chicken in beaten egg whites, which act as a binding agent. Finally, press the chicken into the breadcrumb mixture, ensuring both sides are well covered.
Using an air fryer is the recommended method for cooking the chicken. The circulating hot air ensures an even, crispy finish without the need for excessive oil. Preheat your air fryer to 400°F and cook the chicken for six minutes on each side. For alternative cooking methods, consider oven-baking by preheating to 425°F and following the same flipping technique.

Crispy Chicken Caesar Sandwich
Tips/Tricks
To achieve the best results, ensure the chicken cutlets are thin and even. This allows for quicker cooking and a more consistent texture. If you don’t have thin cutlets, you can easily pound thicker pieces to the desired thickness using a meat mallet.
For an added flavor boost, consider marinating the chicken in the seasoning mixture for a few hours before breading. This step enhances the depth of flavor, making each bite more satisfying. For more chicken dish inspiration, explore the Spicy Yogurt Marinated Chicken recipe.
Perfecting the Crispy Chicken Caesar Sandwich
Perfecting Results
Achieving the perfect crispy chicken Caesar sandwich involves attention to detail. Ensure the chicken is cooked until golden brown and crispy. This not only guarantees a satisfying crunch but also ensures the chicken is fully cooked and safe to eat.
After cooking, allow the chicken to rest for a few minutes. This step lets the juices redistribute, keeping the chicken moist and flavorful. When assembling the sandwich, be sure to add a generous portion of Caesar salad on top of the chicken for a refreshing contrast to the crispy exterior.
Troubleshooting/Variations
If your chicken isn’t as crispy as desired, consider extending the cooking time slightly or checking the calibration of your air fryer or oven. Additionally, ensure that the breadcrumb mixture is applied generously and evenly across the chicken.
For those looking to customize their sandwich, consider adding toppings like sliced tomatoes or avocado. The addition of fresh ingredients can elevate the sandwich, adding layers of flavor and texture. Check out this Crispy Hot Honey Chicken Sandwich for more creative ideas.
Serving and Storing Your Sandwich
Serving/Presentation
Presenting your crispy chicken Caesar sandwich is as important as making it. Once assembled, serve each sandwich with a lemon wedge on the side. A squeeze of lemon over the top adds a refreshing zest that brightens the flavors. For a complete meal, pair the sandwich with a side of fresh fruit or a light salad.
For a family meal or gathering, consider setting up a sandwich bar. Allow guests to personalize their sandwiches with a variety of toppings and dressings. This interactive meal option is always a hit, and it encourages everyone to get creative with their sandwich creations.
Pairings/Storage
Pair your crispy chicken Caesar sandwich with a refreshing drink like iced tea or lemonade. These beverages complement the flavors without overpowering them. If you have leftovers, store the components separately in airtight containers to maintain freshness. When ready to enjoy again, simply reheat the chicken and assemble the sandwich for a quick meal.
Crispy Chicken Caesar Sandwich
For additional inspiration, explore similar recipes like the Crispy Sous Vide Chicken Thighs or the Easy Crispy Zucchini Fritters Recipe. These dishes offer unique twists on classic flavors, perfect for any chicken lover.
Conclusion
The crispy chicken Caesar sandwich is a versatile and flavorful meal that brings excitement to any table. Its combination of crunchy chicken, creamy Caesar salad, and soft sandwich rolls makes it a favorite among all ages. This recipe’s adaptability allows for endless customization, ensuring it caters to every taste preference.
By mastering the techniques and tips outlined, you’ll create a sandwich that’s not only delicious but also visually appealing. The sandwich’s simplicity and flavor-packed profile make it a go-to choice for any occasion, whether it’s a quick lunch or a family dinner. With ingredients readily available in most kitchens, this recipe is both accessible and satisfying.
Embrace the joy of cooking and the satisfaction of sharing a meal that brings loved ones together. The crispy chicken Caesar sandwich stands as a testament to how simple ingredients can transform into something extraordinary. Enjoy the process, and savor every bite of this delightful dish.
