
📑 Table of Contents ▶
- Teriyaki Chicken Stir-Fry
- Mastering Teriyaki Chicken Stir-Fry
- Fundamentals
- Preparation/setup
- Techniques for a Delicious Stir-Fry
- Technique
- Tips and Tricks
- Perfecting Your Stir-Fry
- Perfecting Results
- Troubleshooting and Variations
- Serving and Storing Teriyaki Chicken Stir-Fry
- Serving and Presentation
- Pairings and Storage
- Conclusion
- FAQs – Teriyaki Chicken Stir-Fry
As the creator of ChickenDinnerIdeas, I find joy in transforming simple ingredients into delightful meals. One of my favorite recipes to share is Teriyaki Chicken Stir-Fry. This dish brings back memories of bustling weeknights when time was scarce, but the desire for a flavorful dinner was high.
There’s something magical about the sizzle of chicken and vegetables in a hot skillet. The aroma of soy sauce and ginger fills the kitchen, creating a comforting atmosphere. Teriyaki Chicken Stir-Fry not only satisfies my family’s taste buds but also offers a quick and nutritious solution after a long day.
What makes this Teriyaki Chicken Stir-Fry a staple in my home is its versatility and simplicity. With just a handful of ingredients, many of which are pantry staples, you can whip up a delicious meal in no time. Plus, it’s a great way to use up any leftover vegetables you might have on hand.
Join me as we explore this delightful recipe, perfect for busy evenings or when you’re just in the mood for something tasty and wholesome. Let’s dive into the art of creating a mouthwatering Teriyaki Chicken Stir-Fry that will become a cherished part of your dinner repertoire.
Print
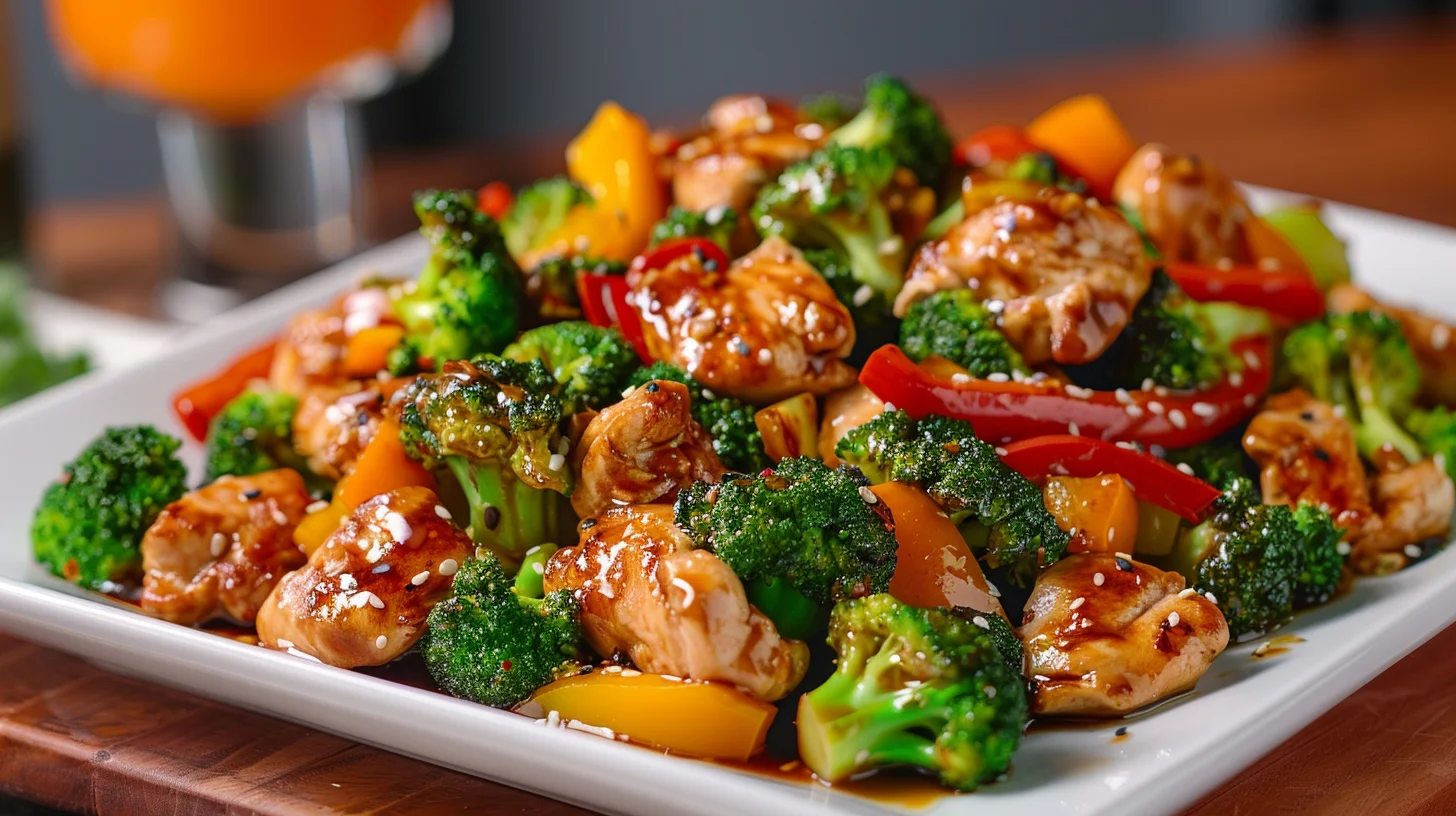
Teriyaki Chicken Stir-Fry
- Prep Time: 15 minutes
- Cook Time: 15 minutes
- Total Time: 30 minutes
- Yield: 4 servings
- Category: Main Course
- Method: Stir-Frying
- Cuisine: Asian
Description
Learn how to make a delicious Teriyaki Chicken Stir-Fry at home with our easy-to-follow recipe. Perfect for a quick and flavorful weeknight meal!
Ingredients
- – 2 boneless skinless chicken breasts (450g)
- – 1/2 teaspoon garlic powder (2.5 ml)
- – Pepper to taste
- – 3 tablespoons cornstarch (45g)
- – 3 tablespoons olive oil, divided (45 ml)
- – 1/2 medium onion
- – 2 cups broccoli florets (300g)
- – 1/2 red bell pepper
- – 1/2 cup chicken broth (120 ml)
- – 3 tablespoons (45 ml) beef broth
- – 2 tablespoons (30 ml) soy sauce
- – 1 teaspoon rice vinegar (or apple cider vinegar) (5 ml)
- – 1/4 cup (packed) brown sugar (60g)
- – 1 tablespoon cornstarch (8g)
- – 1 teaspoon grated fresh ginger (5 ml)
- – 2 cloves garlic, minced
Instructions
- Prepare all your ingredients in advance, as this dish cooks rapidly once you begin. Chop the vegetables into small, uniform pieces, ensuring the broccoli is particularly small to ensure even cooking.
- In a medium-sized bowl, combine all the sauce components and whisk them until well mixed.
- Slice the chicken breasts into 1-inch chunks and place them in another bowl. Season them with garlic powder and pepper, then mix well. Add the cornstarch and stir until the chicken pieces are evenly coated.
- Heat 2 tablespoons of olive oil in a large skillet over medium-high heat, allowing the oil to warm for a few minutes.
- For optimal browning, cook the chicken in two separate batches. Shake off any extra cornstarch from half of the chicken and place it into the skillet. Sear for 4 minutes, then use tongs to turn the pieces over and cook for an additional 3–4 minutes until they are browned and cooked through. Transfer this batch to a plate. Repeat the process with the remaining chicken, adding the remaining tablespoon of olive oil to the skillet.
- If the skillet appears dry, pour in a small amount of olive oil, roughly a teaspoon, and then add the onions. Sauté them for 1 minute, stirring occasionally.
- Introduce the broccoli and bell peppers to the skillet and cook for 3 minutes, stirring frequently, until the vegetables are tender-crisp. Extend the cooking time if you prefer softer vegetables.
- Return the chicken to the skillet and pour in the sauce, giving it a quick whisk before adding. Allow it to simmer until it thickens, which should take less than a minute, while stirring constantly to ensure everything is well coated. Remove the skillet from the heat and serve the dish right away.
Notes
- Marinate the chicken in the sauce mixture for 30 minutes before cooking for enhanced flavor.
- Add snap peas or carrots to the stir-fry for extra color and nutrients.
- Adjust the sweetness level by adding more or less brown sugar to suit your taste.
Mastering Teriyaki Chicken Stir-Fry
Fundamentals
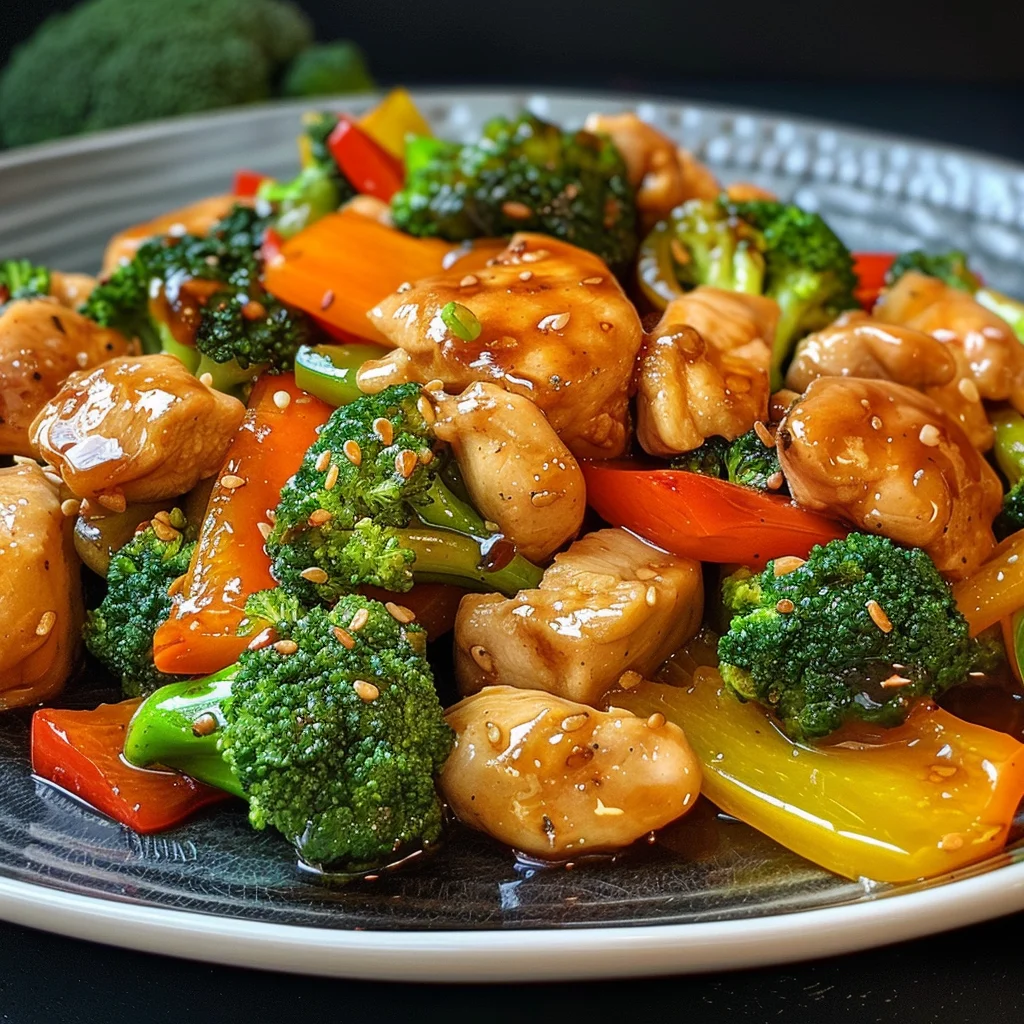
Understanding the fundamentals of Teriyaki Chicken Stir-Fry is essential for crafting a dish that’s both flavorful and balanced. The key is to focus on the harmony of ingredients, each contributing to the overall taste. Chicken serves as the protein base, while the sauce—a blend of soy sauce, brown sugar, and ginger—adds a rich, savory sweetness.
Vegetables play a crucial role in this stir-fry, offering not only nutrition but also texture and color. Broccoli and red bell peppers are excellent choices, providing a vibrant contrast to the golden-brown chicken. For those new to stir-frying, it’s a technique that relies on high heat and quick cooking, ensuring that ingredients retain their freshness and crunch.
Preparation/setup
To prepare your Teriyaki Chicken Stir-Fry, start by gathering all your ingredients. Chop the vegetables into small, uniform pieces to promote even cooking. For the chicken, slice it into 1-inch chunks and coat it with garlic powder, pepper, and cornstarch. This step not only seasons the chicken but also helps achieve a crispy exterior when seared.
Next, whisk together the sauce ingredients—chicken broth, beef broth, soy sauce, rice vinegar, brown sugar, cornstarch, ginger, and minced garlic. This mixture will transform into a glossy, flavorful coating for the chicken and vegetables. Having everything prepped and ready allows you to cook with ease, as stir-frying is a fast-paced process.
Techniques for a Delicious Stir-Fry
Technique
For a successful Teriyaki Chicken Stir-Fry, mastering the technique is crucial. Begin by heating olive oil in a large skillet over medium-high heat. For a crispy texture, cook the chicken in batches, shaking off any excess cornstarch before placing it in the hot oil. This prevents overcrowding, allowing each piece to brown evenly.
Once the chicken is golden and cooked through, remove it from the skillet. If necessary, add a touch more oil before sautéing the onions. This step enhances the flavor base of your stir-fry. After a minute, introduce the broccoli and bell peppers, stirring frequently until they reach a tender-crisp consistency. Return the chicken to the skillet and pour in the sauce, stirring until it thickens and coats everything beautifully.
Teriyaki Chicken Stir-Fry
Tips and Tricks
Achieving the perfect Teriyaki Chicken Stir-Fry involves a few handy tips and tricks. First, ensure your skillet is hot before adding the chicken. This helps create a delicious sear. Additionally, using fresh ginger and garlic enhances the dish’s aromatic profile, making it more enticing.
If you prefer a thicker sauce, adjust the cornstarch in the sauce mixture to your liking. And don’t hesitate to customize the vegetables based on what’s available. Carrots, snap peas, or mushrooms can all add delightful variations. For a complete meal, consider serving this stir-fry with rice, or explore other options like Teriyaki Chicken Rice Bowl for a twist on the classic presentation.
Perfecting Your Stir-Fry
Perfecting Results
To perfect your Teriyaki Chicken Stir-Fry, focus on balancing flavors and textures. The sauce should complement the natural sweetness of the vegetables and the savory notes of the chicken. Taste as you go, adjusting the seasoning if needed to match your palate.
Monitoring the cooking time is also essential. Overcooking can lead to mushy vegetables and dry chicken. Aim for a vibrant, tender-crisp texture, which not only looks appealing but also retains the nutrients. Practice makes perfect, and with each attempt, you’ll refine your technique for consistently delicious results.
Troubleshooting and Variations
If you encounter any issues, such as the sauce being too thin, simply simmer it a bit longer to thicken. For those seeking variety, try incorporating different protein options like tofu or shrimp. Each variation brings a new dimension to the dish, keeping it exciting every time.
Experimenting with different stir-fry recipes can lead to delightful discoveries. If you’re looking for more inspiration, consider exploring Easy Chicken Stir-Fry Recipe or try the flavorful 15 Minute Teriyaki Chicken Bowls for a quick meal option.
Serving and Storing Teriyaki Chicken Stir-Fry
Serving and Presentation
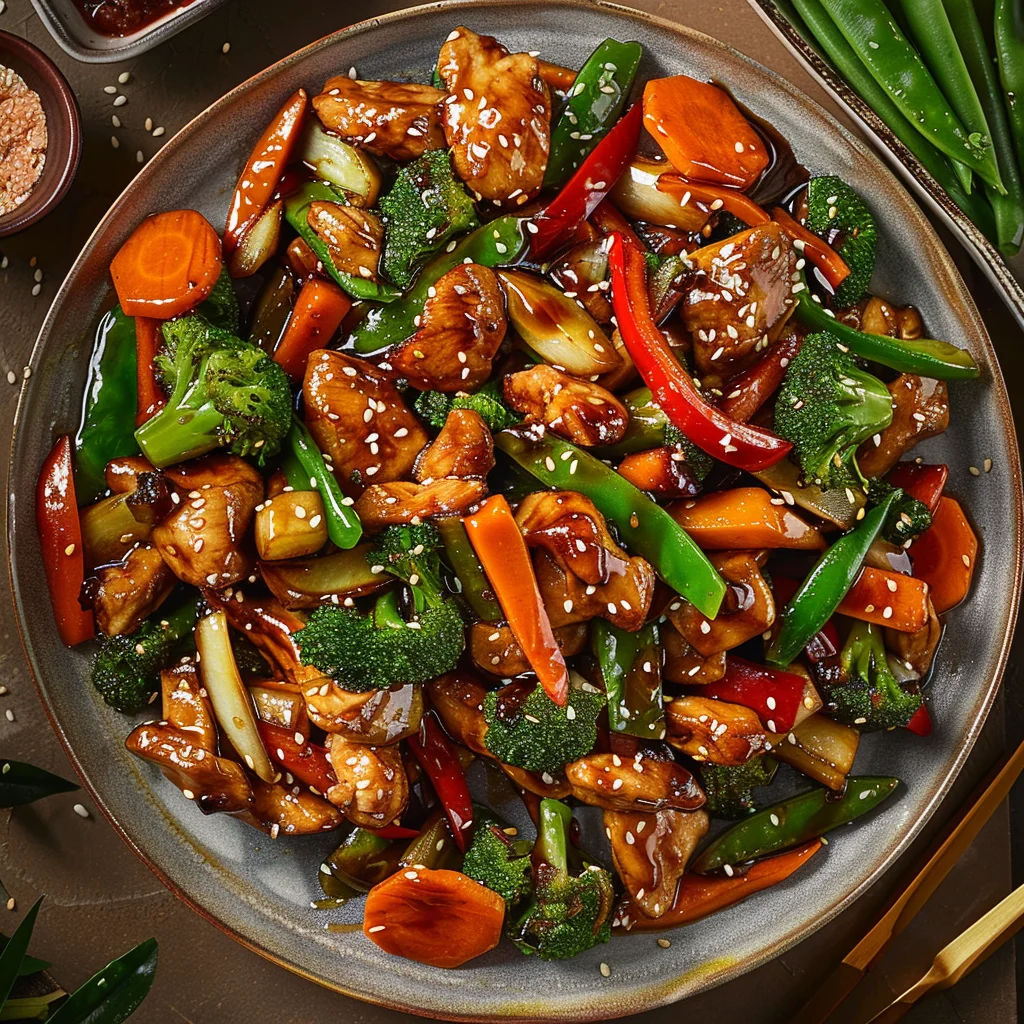
When it comes to serving Teriyaki Chicken Stir-Fry, presentation can elevate the dining experience. Arrange the chicken and vegetables neatly on a platter, drizzle with any extra sauce, and garnish with sesame seeds or chopped scallions for added flair.
Pair this dish with steamed rice or noodles for a complete meal. If you enjoy vibrant plates, consider adding a side of One Pan Baked Teriyaki Salmon and Vegetables to complement the flavors. The combination of textures and colors will make your meal truly memorable.
Pairings and Storage
In terms of storage, Teriyaki Chicken Stir-Fry keeps well in the refrigerator for up to three days. Store it in an airtight container to maintain freshness. When reheating, do so gently on the stovetop to avoid overcooking the vegetables.
Teriyaki Chicken Stir-Fry
For those who love meal prepping, this stir-fry can be an excellent addition to your weekly plan. It reheats beautifully, making it a convenient option for quick lunches or dinners. Pair it with Crispy Chicken Strips for a delightful contrast in texture.
Conclusion
Teriyaki Chicken Stir-Fry stands out as a versatile and delicious dish, perfect for busy weeknights or when you’re craving something flavorful. By mastering the fundamentals and techniques, you can create a meal that’s not only satisfying but also visually appealing.
Whether you’re following the recipe closely or experimenting with variations, this stir-fry offers endless possibilities. Its quick preparation and adaptability make it a staple in any kitchen, providing a nutritious and tasty option for all.
With the tips and tricks shared, you’ll be well on your way to perfecting your own Teriyaki Chicken Stir-Fry. Enjoy the process, and let this dish become a cherished part of your culinary journey.
