
📑 Table of Contents ▶
- White Chicken Chili Made In The Dutch Oven
- White Chicken Chili Made In The Dutch Oven: Fundamentals
- Fundamentals
- Preparation/setup
- White Chicken Chili Dutch Oven Technique
- Technique
- Tips/tricks
- Perfecting White Chicken Chili Dutch Oven Results
- Perfecting results
- Troubleshooting/variations
- White Chicken Chili Dutch Oven Serving Ideas
- Serving/presentation
- Pairings/storage
- Conclusion
- FAQs – White Chicken Chili Made In The Dutch Oven
When I first discovered the magic of White Chicken Chili Made In The Dutch Oven, I was immediately hooked. Picture this: a chilly evening, family gathered around, and the warm aroma wafting through the kitchen. There’s something incredibly comforting about this dish that brings everyone together. The first time I made it, I was amazed at how easy it was to create such a flavorful meal.
My love for White Chicken Chili Made In The Dutch Oven grew from a simple experiment to a go-to recipe in my household. It’s not just about the taste; it’s about the process of bringing flavors to life. The combination of spices, tender chicken, and creamy texture is irresistible. I remember thinking, “Why hadn’t I tried this earlier?”
The convenience of making White Chicken Chili Made In The Dutch Oven is unmatched. With minimal preparation and a little patience, a delicious dinner is ready to be served. It’s perfect for those who love a hearty meal without spending hours in the kitchen. This dish has become a staple in my home, especially during the cooler months. Let’s dive into the world of this delightful chili and explore each step of the process.

White Chicken Chili Made In The Dutch Oven
- Prep Time: 20 minutes
- Cook Time: 45 minutes
- Total Time: 1 hour 5 minutes
- Yield: 8 servings
- Category: Main Course
- Method: Boiling
- Cuisine: Mexican
Description
Learn how to make delicious white chicken chili in a Dutch oven with this easy recipe. Perfect for cozy nights in or entertaining guests. Click here now!
Ingredients
- – 1 teaspoon chili powder (5 ml)
- – ½ teaspoon each: ground cumin, dried oregano, salt, mustard powder (2.5 ml)
- – 1/4 teaspoon each: black pepper, paprika (1.25 ml)
- – 1 pinch red pepper flakes
- – 3 tablespoons vegetable oil (45 g)
- – 1 yellow onion, diced
- – 1 large jalapeno pepper, seeded and diced
- – 4 cloves garlic, minced
- – 3 tablespoons all-purpose flour (23 g)
- – 6 cups (1440 ml) beef broth (1.4 liters)
- – 1/3 cup milk (80 ml)
- – 2 (15.5 oz (439 g).) cans cannellini beans, drained
- – 1 teaspoon (5 ml) hot sauce
- – 1 teaspoon (5 ml) soy sauce
- – 2 (4 oz (113 g).) cans mild green chilies, undrained
- – 1 1/2 lbs (680 g). boneless skinless chicken breast, see notes
- – Salt/Pepper
- – 1 (15.25 oz (432 g).) can whole kernel sweet corn, drained. Can sub frozen corn.
- – 8 oz. cream cheese, softened (225 g)
- – Lime wedges, Diced Avocado, Sour cream, Tortilla Strips, Fritos, Monterey or Pepper Jack cheese.
Instructions
- Mix the spices together and put them aside.
- In a 4 1/2-quart pot, heat the vegetable oil over medium heat. Add the chopped onions and jalapeno, cooking for 5 minutes. Stir in the minced garlic and cook for another minute.
- Sprinkle in the flour and mix well, cooking for 2 minutes to eliminate the raw flour taste.
- Gradually pour in the beef broth, stirring constantly. Slowly incorporate the milk in the same way.
- Optional: Set aside a generous cup of drained beans and blend with ½ cup of broth using a food processor, blender, or immersion blender. Stir this mixture into the soup along with the remaining whole beans. (This helps thicken the soup.) Alternatively, you can add all the beans whole.
- Add the spice mixture, hot sauce, soy sauce, and green chilies. Bring the mixture to a boil and let it gently boil for 15 minutes, uncovered, then lower the heat to simmer.
- Season the chicken on both sides with salt and pepper. Add the chicken and corn to the pot, allowing it to simmer gently for 15-20 minutes, uncovered. Stir occasionally to prevent beans from sticking to the bottom.
- Take the chicken out and shred it once it’s cooked through. Put the shredded chicken back in the pot.
- Lower the heat and incorporate the softened cream cheese, stirring continuously until it melts completely into the chili.
- Taste the chili and adjust the spices if necessary. Serve with a side of cornbread!
Notes
- For a spicier chili, adjust the chili powder or red pepper flakes to your taste.
- Create a thicker chili by pureeing some beans with broth for a creamier texture.
- Ensure the chicken is cooked properly before shredding to prevent dryness in the chili.
White Chicken Chili Made In The Dutch Oven: Fundamentals
Fundamentals
Creating White Chicken Chili Made In The Dutch Oven starts with understanding the core ingredients. The base of this dish consists of a carefully curated blend of spices. The chili powder, cumin, oregano, salt, mustard powder, black pepper, paprika, and red pepper flakes create a depth of flavor that sets this chili apart. The spices are the backbone, infusing the dish with warmth and complexity.
The choice of ingredients is crucial. Using fresh vegetables like a diced yellow onion and a large jalapeno adds a refreshing crunch and a hint of heat. The garlic, minced to perfection, brings an aromatic touch that elevates the entire dish. These components work together to create a robust foundation for the chili.
Preparation/setup
The preparation of White Chicken Chili Made In The Dutch Oven is straightforward yet essential for achieving the best results. Begin by heating the vegetable oil in your Dutch oven over medium heat. Once the oil is heated, add the diced onions and jalapeno. Cook them for about five minutes until they become soft and translucent. This step is crucial for building the base flavors of the chili.
Next, stir in the minced garlic, allowing it to cook for an additional minute. Garlic adds a fragrant aroma that is simply irresistible. Sprinkle the flour over the vegetable mixture and stir well, cooking for about two minutes. This step ensures the flour loses its raw taste and helps thicken the chili later on.
White Chicken Chili Dutch Oven Technique
Technique
Mastering the technique of making White Chicken Chili Made In The Dutch Oven is key to achieving a delicious meal. After preparing the base, gradually pour in the beef broth while stirring constantly. This gradual addition prevents lumps from forming and integrates all the flavors seamlessly. Slowly incorporate the milk in the same manner, ensuring a smooth consistency.
For those who enjoy a thicker chili, there’s an optional step to blend a portion of the beans with some broth. This mixture can then be stirred back into the chili, providing a creamier texture. Alternatively, you can add all the beans whole, which is equally delightful. The choice is yours based on your preference for texture.
White Chicken Chili Made In The Dutch Oven
Tips/tricks
When making White Chicken Chili Made In The Dutch Oven, there are a few tips to keep in mind for an optimal outcome. First, ensure the chicken is seasoned well with salt and pepper before adding it to the pot. This step enhances the flavor profile of the dish. Additionally, allow the chili to boil gently for 15 minutes before lowering the heat to simmer, which helps meld the flavors together.
Stir the chili occasionally to prevent the beans from sticking to the bottom of the pot. This ensures even cooking and a consistent texture throughout. And remember, the cream cheese should be added after lowering the heat to avoid curdling. Stir continuously until it melts completely, resulting in a silky, creamy finish.
Perfecting White Chicken Chili Dutch Oven Results
Perfecting results
Achieving perfection with White Chicken Chili Made In The Dutch Oven is all about balance. Once the chicken is cooked through, remove it from the pot and shred it before returning it to the chili. This step ensures the chicken is tender and well-incorporated into the dish. The addition of corn brings a touch of sweetness that contrasts beautifully with the spice blend.
Adjust the seasoning as needed. Taste the chili and add more spices if desired. It’s important to tailor the dish to your personal taste preferences. Don’t shy away from experimenting with the spice levels to create a chili that’s uniquely yours. The result is a comforting meal that’s both hearty and satisfying.
Troubleshooting/variations
If you encounter any issues while making White Chicken Chili Made In The Dutch Oven, a few adjustments can easily resolve them. If the chili is too thick, simply add more broth to reach your desired consistency. Conversely, if it’s too thin, allow it to simmer longer to reduce the liquid.
For variations, try adding different toppings like diced avocado, sour cream, or tortilla strips for added texture. You can also experiment with different types of cheese, such as Monterey or Pepper Jack, to suit your taste. These variations can elevate the dish and cater to a wide range of palates.
White Chicken Chili Dutch Oven Serving Ideas
Serving/presentation
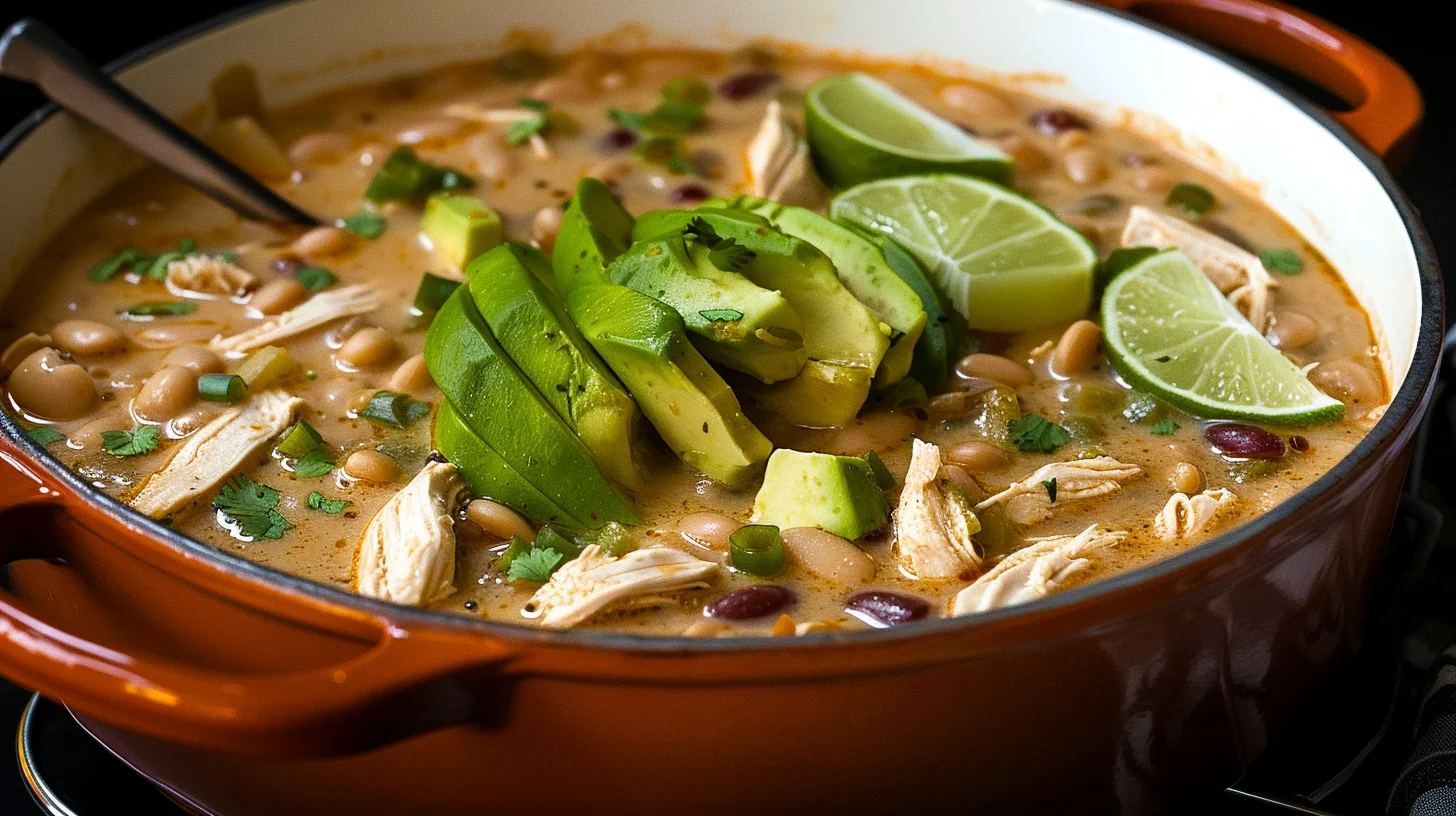
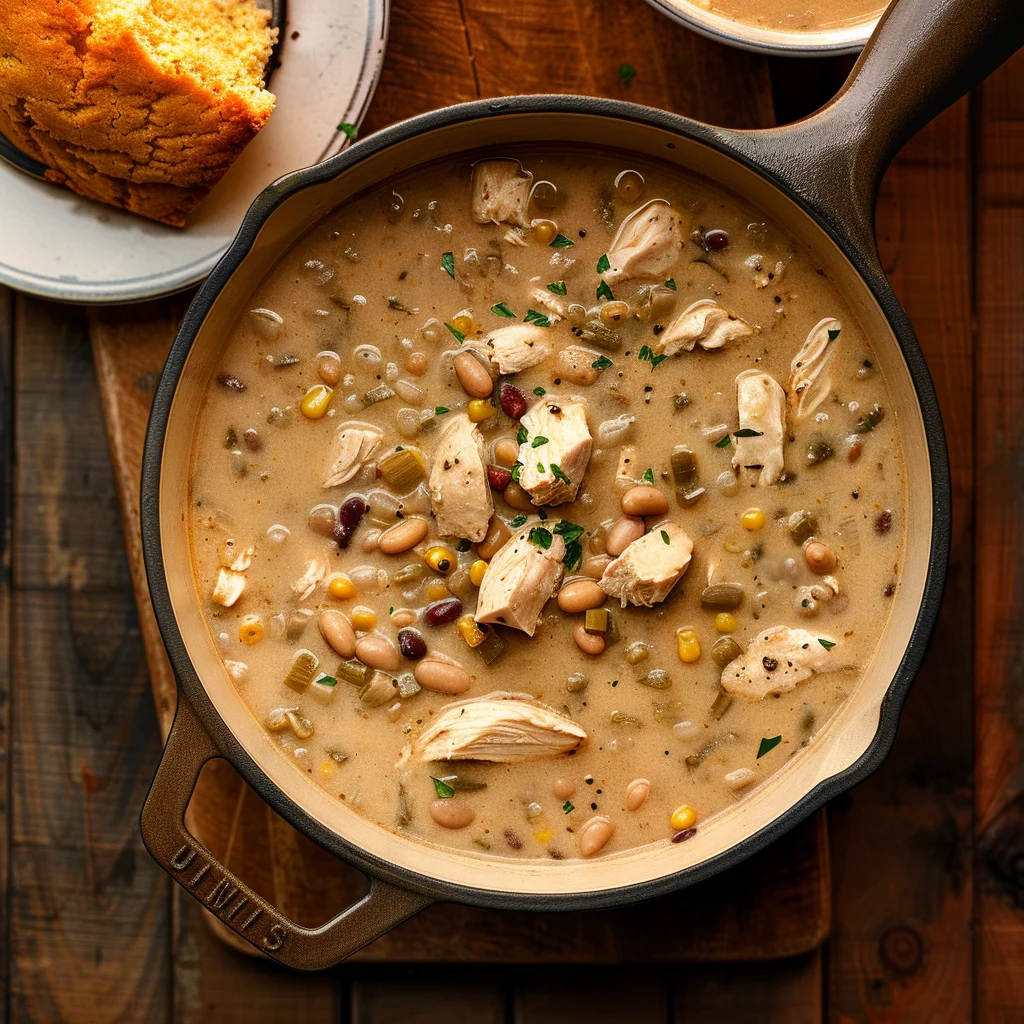
Presentation plays a crucial role in the enjoyment of White Chicken Chili Made In The Dutch Oven. Serve it in bowls with a side of cornbread for a complete meal. The vibrant colors of the chili, combined with the toppings, create an inviting and appetizing dish. Lime wedges on the side add a fresh, zesty touch that complements the flavors beautifully.
For a creative twist, serve the chili with Fritos or tortilla strips for a delightful crunch. These additions not only enhance the texture but also make the meal more fun and interactive. The combination of flavors and textures ensures a memorable dining experience.

White Chicken Chili Made In The Dutch Oven
Pairings/storage
Pairing White Chicken Chili Made In The Dutch Oven with the right sides can elevate the meal. Consider serving it with a fresh green salad or a bowl of guacamole for a refreshing contrast. For storage, keep any leftovers in an airtight container in the refrigerator for up to three days. The flavors actually deepen with time, making it an excellent option for make-ahead meals.
Reheat the chili gently on the stove over low heat, stirring occasionally to maintain its creamy consistency. Avoid reheating at high temperatures to prevent the cream cheese from curdling. This attention to detail ensures that each serving is as delicious as the first.
Conclusion
White Chicken Chili Made In The Dutch Oven is a versatile and flavorful dish that brings warmth and comfort to any meal. The combination of spices, tender chicken, and creamy texture creates a satisfying experience that is hard to resist. By following the steps and tips outlined, you can master this dish and make it a regular feature on your dining table.
The simplicity of the preparation process, coupled with the robust flavors, makes this chili a favorite for both novice and experienced cooks. Whether you’re serving it for a family dinner or a cozy night in, White Chicken Chili Made In The Dutch Oven is sure to impress. Enjoy the process, savor the flavors, and make this dish your own.
