

📑 Table of Contents ▶
- Baked Chicken Enchiladas: Mastering the Basics
- Fundamentals
- Preparation/setup
- Directions
- Crafting Perfect Oven Baked Chicken Enchiladas
- Technique
- Tips/tricks
- Elevating Your Baked Chicken Enchiladas
- Perfecting results
- Troubleshooting/variations
- Serving Your Oven Baked Chicken Enchiladas
- Presentation
- Pairings/storage
Oven Baked Chicken Enchiladas
Nothing beats the comforting satisfaction of a well-made enchilada. Picture a busy weeknight after a long day, where the thought of cooking feels overwhelming. The aroma of warm rotisserie chicken fills the kitchen, and you know dinner can come together in a matter of minutes. Oven baked chicken enchiladas perfectly fit that scenario, turning simple ingredients into a delightful meal.
The beauty of using rotisserie chicken lies not only in the convenience it brings but also in the rich flavor it offers. Pair that with creamy cream cheese, zesty taco seasoning, and flavorful green chiles, and you’ve got a dish that’s both easy to prepare and incredibly satisfying. The process transforms those tortillas into a cheesy, gooey delight that sings comfort food.
In this article, explore how to create these oven-baked chicken enchiladas that not only highlight the versatile nature of chicken but also bring family and friends together around the dinner table. With just a few simple steps, you’ll discover how easy and enjoyable it can be to whip up a batch of these enchiladas any day of the week.
Baked Chicken Enchiladas: Mastering the Basics
Fundamentals
To master the art of baked chicken enchiladas, understanding the core components is essential. Oven baked chicken enchiladas require a combination of flavors and textures that create a satisfying meal. From the creamy mixture enveloping shreds of chicken to the cheesy topping that melts and bubbles, every layer plays a vital role.
The key ingredients work together seamlessly. The taco seasoning infuses the dish with spices, while the cream cheese and sour cream provide a creamy element that holds everything together. Knowing the right balance of these flavors will elevate your enchiladas to the next level.
Preparation/setup
Begin your culinary journey by preheating the oven to 350°F (175°C). Preparing your baking dish sets the stage for assembling the enchiladas. A 9×13-inch dish works perfectly. Arrange your ingredients on the countertop to streamline the process. With everything in reach, the assembly becomes quick and efficient.
Shred the rotisserie chicken and ensure your cream cheese is softened for easier mixing. Having diced green chiles ready to go enhances the flavor and adds a delightful kick. A simple setup guarantees that the cooking process is both fun and fulfilling.
Ingredients
Gather the following ingredients for your oven baked chicken enchiladas:
- Rotisserie chicken
- Cream cheese
- Sour cream
- Taco seasoning
- Chicken broth
- Diced green chiles
- Tortillas
- Cheese (for topping)
- Green onions (for garnish)
Directions
- Preheat the oven to 350°F (175°C).
- In a large bowl, mix together shredded rotisserie chicken, cream cheese, sour cream, taco seasoning, chicken broth, and diced green chiles until well combined.
- Fill each tortilla with the chicken mixture, roll them up, and place them seam-side down in a baking dish.
- Sprinkle cheese on top of the enchiladas.
- Bake in the preheated oven for about 20-25 minutes, or until heated through and the cheese is melted.
- Garnish with green onions before serving.
Crafting Perfect Oven Baked Chicken Enchiladas
Technique
Creating oven baked chicken enchiladas requires a few specific techniques to ensure the best flavor and texture. Properly shredding the rotisserie chicken helps distribute the meat evenly throughout the enchiladas. Aim for fine shreds so that each bite contains a satisfying amount of chicken.
When filling the tortillas, do not overstuff. A compact roll allows easy handling and keeps the filling inside during baking. Be sure to warm the tortillas slightly before assembly. This enhances their flexibility, making them less likely to crack as you roll them up.
Tips/tricks
To enhance your enchiladas, consider a few additional tips. Always sample your filling before wrapping. Adjust the seasoning to suit your taste if needed, adding more taco seasoning or green chiles for extra kick.
Experiment with different cheese types for topping. A blend of Mexican cheese or Monterey Jack can add a delightful creaminess. For those who like a bit of heat, add sliced jalapeños in the filling or on top before baking. Unleash your creativity and customize your enchiladas to suit your personal preferences.
Elevating Your Baked Chicken Enchiladas
Perfecting results
Achieving the perfect baked chicken enchiladas comes down to three crucial elements: flavor, texture, and presentation. Ensure your filling is flavorful by not skimping on the taco seasoning and making sure the cream cheese and sour cream blend smoothly.
The texture of the enchiladas should be creamy and cheesy, with a slight crisp on top achieved by baking. If your cheese finishes melting but you desire a bit of browning, switch on the broiler for the last few minutes of baking.
Troubleshooting/variations
Sometimes, things don’t go as planned. If your chicken enchiladas seem dry, you may have overbaked them. Always keep an eye on the timer, and consider adding a little more chicken broth to your filling to keep moisture levels high.
On the other hand, if you want a variation, think about making a green sauce version instead of the traditional red sauce. Simply blend fresh tomatillos, cilantro, and lime juice for a zesty alternative. There are endless possibilities when it comes to chicken enchiladas, so feel free to experiment!
Serving Your Oven Baked Chicken Enchiladas
Presentation
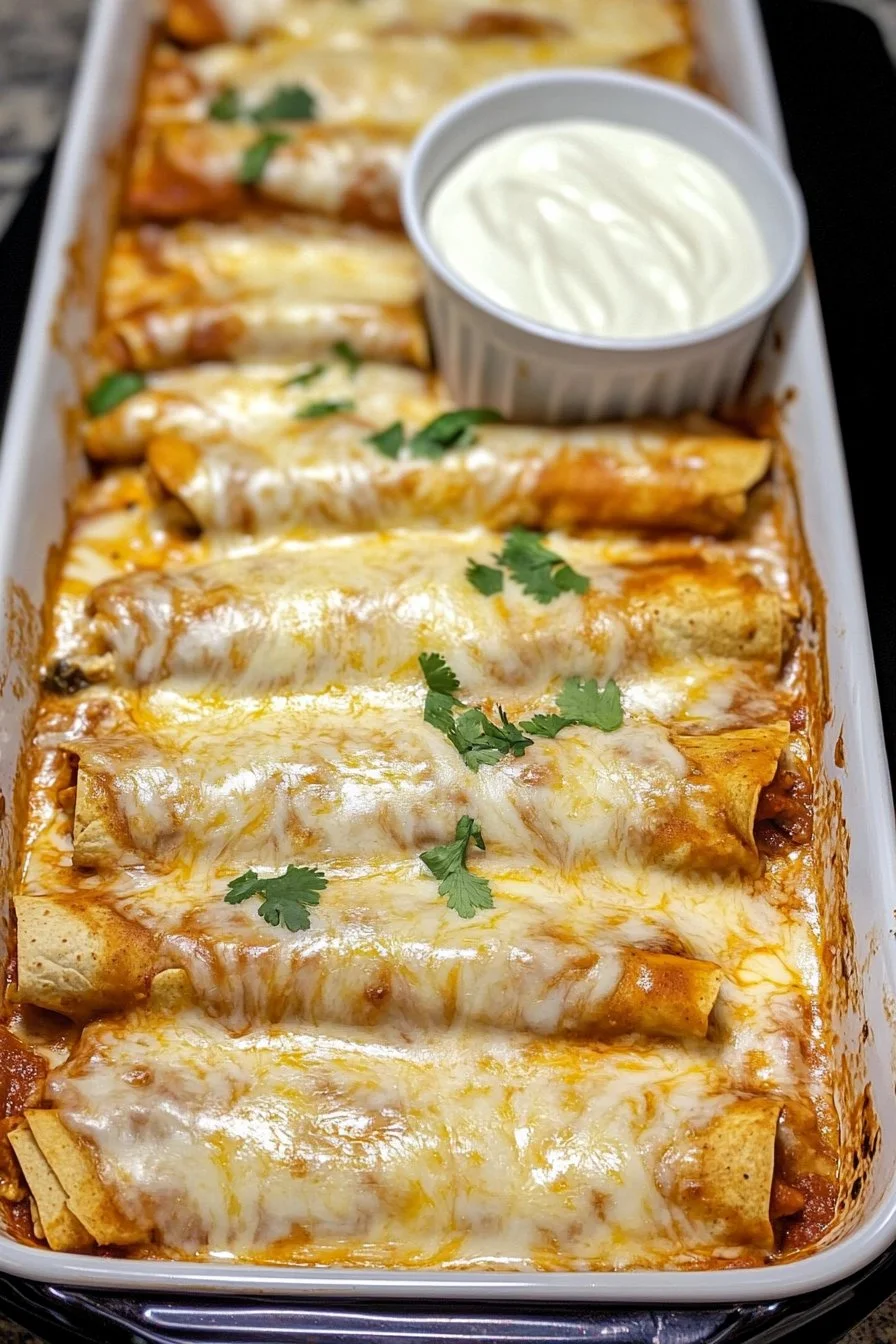
Serving baked chicken enchiladas is as enjoyable as preparing them. Place the enchiladas on a colorful platter, and sprinkle fresh green onions over the top for an added pop of color and flavor.
Consider drizzling some sour cream or a tangy salsa on the side for guests to customize their plates. As the steam rises from the dish, the alluring aroma invites everyone to indulge. Enjoy the meal family-style by letting everyone serve themselves, fostering a sense of togetherness.
Pairings/storage
Though traditional pairings can vary, you can never go wrong with a simple green salad or black bean and corn salad to accompany your enchiladas. The bright and fresh salad balances the richness of the dish, providing a satisfying bite.
For leftovers, store individual portions in airtight containers in the refrigerator. Reheating is a breeze, and you’ll find that the flavors have melded even further over time. When properly stored, your baked chicken enchiladas can last up to three days in the fridge, making them a perfect make-ahead meal.
Oven baked chicken enchiladas deliver both flavor and convenience, creating delightful memories around the dinner table while making dinnertime feel effortless.
Print
Oven Baked Chicken Enchiladas
- Prep Time: 15 minutes
- Cook Time: 25 minutes
- Total Time: 40 minutes
- Yield: 4 servings
- Category: Main Course
- Method: Baking
- Cuisine: Mexican
- Diet: None
Description
Delight in the comforting satisfaction of oven-baked chicken enchiladas made with rotisserie chicken, cream cheese, and a blend of spices. Perfect for busy weeknights!
Ingredients
- Rotisserie chicken, shredded
- Cream cheese, softened
- Sour cream
- Taco seasoning
- Chicken broth
- Diced green chiles
- Tortillas
- Cheese (for topping)
- Green onions (for garnish)
Instructions
- Preheat the oven to 350°F (175°C).
- In a large bowl, mix together shredded rotisserie chicken, cream cheese, sour cream, taco seasoning, chicken broth, and diced green chiles until well combined.
- Fill each tortilla with the chicken mixture, roll them up, and place them seam-side down in a baking dish.
- Sprinkle cheese on top of the enchiladas.
- Bake in the preheated oven for about 20-25 minutes, or until heated through and the cheese is melted.
- Garnish with green onions before serving.
Notes
Consider experimenting with different types of cheese or adding jalapeños for extra heat. Always sample the filling before wrapping.
