
📑 Table of Contents ▶
- Panko Chicken Garlic Aioli
- Panko Chicken Garlic Aioli: The Basics
- Fundamentals
- Preparation/setup
- Mastering Panko Chicken with Garlic Aioli
- Technique
- Tips/tricks
- Perfecting Your Panko Chicken Garlic Aioli
- Perfecting results
- Troubleshooting/variations
- Serving and Storing Your Panko Chicken Garlic Aioli
- Serving/presentation
- Pairings/storage
- Conclusion
- FAQs – Panko Chicken Garlic Aioli
Creating flavorful meals with minimal fuss is my passion, and today, it’s all about the delightful Panko Chicken Garlic Aioli. Imagine biting into a crispy, golden crust that gives way to tender, juicy chicken. This dish has become a staple in my household, perfect for those hectic weeknights when time is short, but the craving for something delicious is strong.
I love how the panko breadcrumbs lend a satisfying crunch, while the garlic aioli brings a tangy zing that elevates every bite. It’s a recipe that brings warmth and comfort, making it an instant favorite among family and friends. Whether you’re cooking for a crowd or just a cozy dinner for two, this Panko Chicken Garlic Aioli is bound to impress.
As I share this recipe, I hope to inspire you to make dinnertime a highlight of your day. With simple ingredients and straightforward instructions, even novice cooks can whip up this dish with ease. By the end of this article, you’ll be ready to add Panko Chicken Garlic Aioli to your repertoire of go-to meals.

Panko Chicken Garlic Aioli
- Prep Time: 20 minutes
- Cook Time: 35 minutes
- Total Time: 55 minutes
- Yield: 2 servings
- Category: Main Course
- Method: Baking and Frying
- Cuisine: American
Description
Learn how to make crispy Panko Chicken with a flavorful Garlic Aioli sauce. This easy recipe will elevate your next meal!
Ingredients
- 2 boneless, skinless chicken breasts
- 1 cup (60 g) breadcrumbs
- 1/2 cup (60 g) all-purpose flour
- 2 large eggs
- 1 teaspoon (5 ml) salt
- 1/2 teaspoon (3 ml) black pepper
- 1 teaspoon (5 ml) paprika
- 1 teaspoon (5 ml) garlic powder
- 1/2 cup (120 ml) mayonnaise
- 2 cloves minced garlic
- 1 tablespoon (15 ml) lemon juice
- 1 tablespoon (15 ml) olive oil
- 1 tablespoon (15 ml) chopped fresh parsley (optional for garnish)
Instructions
- Preheat oven to 400°F (200°C) and line a baking sheet with parchment paper.
- Pound the chicken breasts to an even thickness using a meat mallet or rolling pin.
- In a shallow dish, combine flour, salt, black pepper, paprika, and garlic powder.
- In another shallow dish, beat the eggs.
- In a third shallow dish, place the panko breadcrumbs.
- Dredge each chicken breast in the flour mixture, shaking off excess.
- Dip the floured chicken into the beaten eggs, ensuring it is well-coated.
- Press the chicken into the panko breadcrumbs, covering completely.
- Heat olive oil in a skillet over medium heat.
- Sear each chicken breast for 2-3 minutes per side until golden brown.
- Transfer seared chicken to the prepared baking sheet.
- Bake in the oven for 15-20 minutes, or until cooked through.
- Meanwhile, mix mayonnaise, minced garlic, and lemon juice in a small bowl.
- Let the chicken rest for 5 minutes after baking.
- Serve the chicken with garlic aioli drizzled over the top.
- Garnish with chopped fresh parsley, if using.
Notes
- Try using whole wheat breadcrumbs for a lighter option.
- Experiment with Italian seasoning or cajun spice for extra flavor.
- Make the garlic aioli creamier by adding Greek yogurt or sour cream.
Panko Chicken Garlic Aioli: The Basics
Fundamentals
The key to the perfect Panko Chicken Garlic Aioli lies in the balance of flavors and textures. Chicken breasts provide a lean protein base, while the panko breadcrumbs offer a light, crispy coating that seals in the juices. The garlic aioli, with its creamy texture and bold flavor, complements the chicken beautifully.
This dish requires just a few pantry staples, making it accessible for any home cook. The magic happens when these simple ingredients come together, transforming into a dish that feels gourmet yet is incredibly easy to prepare. The right combination of spices, including paprika and garlic powder, adds depth and warmth without overwhelming the palate.
Preparation/setup
Start by preheating your oven to 400°F (200°C) and lining a baking sheet with parchment paper. This ensures even cooking and easy cleanup. Use a meat mallet or rolling pin to pound the chicken breasts to an even thickness, which helps them cook uniformly.
Next, organize your ingredients into three shallow dishes: one for the flour mixture, one for the beaten eggs, and one for the panko breadcrumbs. This assembly line setup makes the dredging process efficient and mess-free. A well-prepped station allows you to focus on achieving the perfect crust.
Mastering Panko Chicken with Garlic Aioli
Technique
The secret to mastering Panko Chicken Garlic Aioli lies in the dredging technique. First, coat the chicken in the seasoned flour, ensuring each piece is lightly covered. This layer helps the egg adhere to the chicken, which in turn allows the breadcrumbs to stick.
After dipping the chicken in the egg, press it firmly into the panko breadcrumbs. This step is crucial for achieving a thick, even crust that crisps up beautifully when cooked. A quick sear in the skillet locks in the juices and sets the crust before the chicken finishes cooking in the oven.
Panko Chicken Garlic Aioli
Tips/tricks
For an even crispier coating, consider using a combination of regular and panko breadcrumbs. This blend provides a robust texture that holds up well during cooking. Additionally, make sure your oil is hot before adding the chicken to the skillet. This ensures a quick, golden sear without absorbing too much oil.
If you enjoy exploring different flavor profiles, you might want to try this Sassy Honey Garlic Chicken Delight. For those who favor easy cleanup, the One-Pot Honey Garlic Chicken and Noodles is a delightful alternative.
Perfecting Your Panko Chicken Garlic Aioli
Perfecting results
Achieving the perfect Panko Chicken Garlic Aioli involves attention to detail and practice. Rest the chicken for five minutes after baking to allow the juices to redistribute, ensuring each bite is tender and flavorful. During this time, the crust sets further, enhancing its crispy exterior.
For a twist on the classic recipe, try adding a pinch of cayenne pepper to the flour mixture for a subtle kick. Alternatively, mix a teaspoon of dried herbs like thyme or oregano into the breadcrumbs for an aromatic touch. These small changes can elevate your dish and keep it exciting.
Troubleshooting/variations
If your chicken turns out dry, consider reducing the baking time slightly. Every oven is different, so it’s important to monitor the chicken closely during the last few minutes of cooking. For those who prefer a lighter dish, try baking directly without searing, as demonstrated in this Honey Dijon Garlic Chicken Breasts recipe.
Looking for another way to enjoy garlic-infused dishes? Check out the Sous Vide Chicken Breasts with Lemon Garlic and Rosemary for a tender and flavorful alternative.
Serving and Storing Your Panko Chicken Garlic Aioli
Serving/presentation
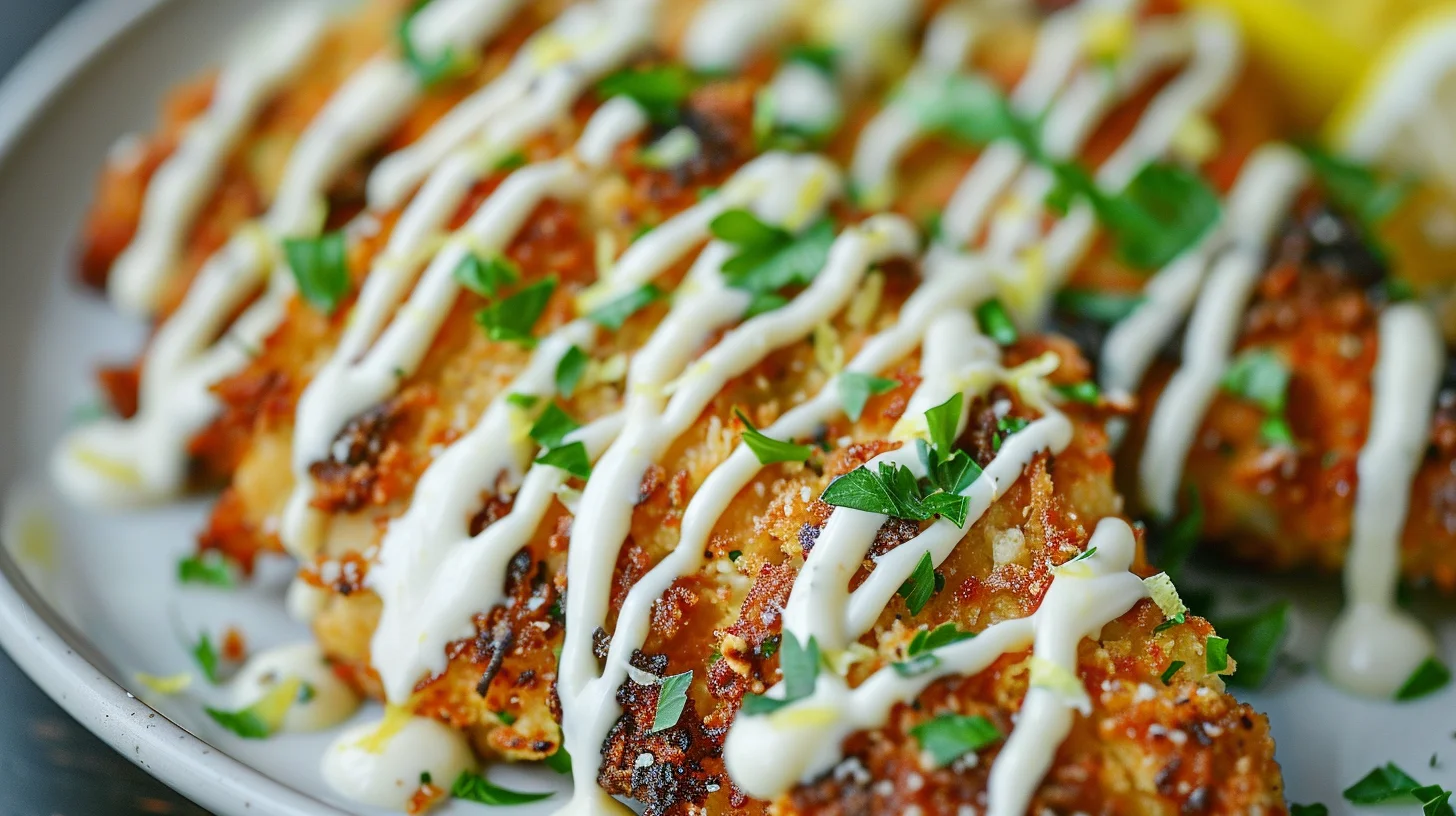
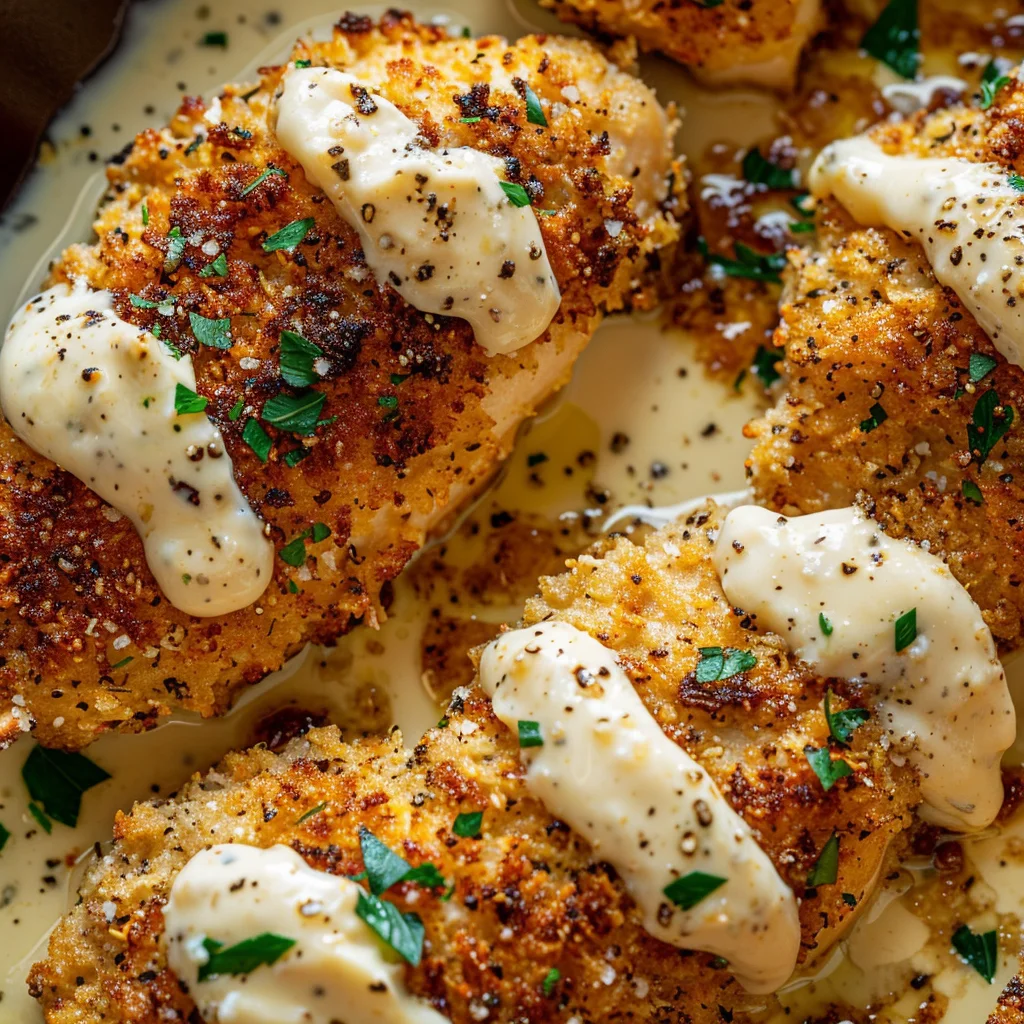
When it’s time to serve your Panko Chicken Garlic Aioli, presentation is key. Drizzle the garlic aioli over the sliced chicken breasts, allowing the sauce to cascade down the golden crust. For an added touch of freshness, sprinkle chopped fresh parsley on top. This not only adds color but also enhances the flavors with a hint of herbaceous brightness.
This dish pairs wonderfully with a crisp salad or roasted vegetables. If you’re in the mood for a hearty side, consider serving it alongside Grilled Chicken and Broccoli Bowl with Creamy Garlic Sauce. The combination of textures and flavors makes for a satisfying meal.

Panko Chicken Garlic Aioli
Pairings/storage
In terms of storage, any leftovers can be kept in an airtight container in the refrigerator for up to three days. To maintain the chicken’s crispiness, reheat in the oven rather than the microwave. This method helps the crust regain its crunch and keeps the chicken juicy.
For those looking to explore more garlic-themed recipes, the One Skillet Chicken with Garlicky Mushroom Cream Sauce offers a delightful alternative. The rich, savory sauce is perfect for anyone who loves the depth of garlic flavor.
Conclusion
The Panko Chicken Garlic Aioli delivers a delicious and satisfying meal with its crispy coating and flavorful sauce. Mastering this recipe involves simple techniques that result in a dish that is both impressive and easy to prepare. With its minimal ingredient list and straightforward process, it’s an ideal choice for busy weeknights or a cozy dinner.
The versatility of this dish allows for endless variations and pairings, ensuring it never gets old. Whether you’re a seasoned cook or a kitchen novice, this recipe provides the perfect opportunity to hone your skills and impress your guests. The Panko Chicken Garlic Aioli is more than just a meal; it’s an experience that brings joy and flavor to your table.
