
📑 Table of Contents ▶
- Crispy Dill Pickle Parmesan Chicken: The Fundamentals
- Fundamentals
- Preparation/setup
- Perfecting Crispy Dill Pickle Parmesan Chicken
- Technique
- Tips/tricks
- Troubleshooting and Variations
- Perfecting results
- Variations
- Serving and Storage of Crispy Dill Pickle Parmesan Chicken
- Serving/presentation
- Pairings/storage
Crispy Dill Pickle Parmesan Chicken: An Amazing Ultimate Recipe
A love for crispy chicken runs deep in my family. As a child, I would stand on my tiptoes, peeking over the counter as my mom prepared her famous chicken dinners. The scent of spices and frying chicken filled the air, making my stomach rumble in anticipation. When she introduced a delightful twist with dill pickle brine, I was initially skeptical. However, one taste of her Crispy Dill Pickle Parmesan Chicken changed everything. The combination of crunchy breading, savory Parmesan, and that unique tang from the pickles became a family favorite overnight.
Embracing this flavor fusion not only enhanced our dinner table, but it also brought us closer together. Families gather over food, sharing stories and laughter, and this chicken recipe allows everyone to enjoy something special. It’s an exciting way to turn an ordinary evening into a memorable occasion. Let’s explore the secrets to making this dish shine in your home kitchen.
Prepare to enjoy your evenings with this tasty and straightforward recipe that takes just a little time to create amazing flavor. Discover how to result in crispy perfection with just a handful of ingredients as we break down the process into manageable steps.
Crispy Dill Pickle Parmesan Chicken: The Fundamentals
Fundamentals
To embark on your Crispy Dill Pickle Parmesan Chicken adventure, you need to gather your ingredients. This recipe relies on four boneless, skinless chicken breasts as the main star. Having the right size ensures even cooking, allowing that golden, crispy exterior to develop perfectly.
The heart of this cooking process lies in the dill pickle juice. This marinating step tenderizes the chicken, infusing it with a distinctive flavor that makes this recipe truly unique. Use a high-quality dill pickle juice for that authentic taste. The saltiness and tang will permeate the chicken, creating a delectable final result. Along with the chicken, incorporate seasoned breadcrumbs and grated Parmesan cheese, which contribute crunch and rich flavor.
Preparation/setup
Start by marinating the chicken in a bowl with a cup of dill pickle juice. This essential step not only enhances the taste but also ensures moistness. For a more dynamic flavor, consider marinating for an extended period—two hours or even overnight.
Next comes the breading station. Using three bowls gives your preparation methodical order. In the first bowl, mix all-purpose flour with garlic powder, onion powder, paprika, salt, and pepper. This seasoned flour will create a robust base for your chicken. In your second bowl, whisk two large eggs until frothy. Then, mix breadcrumbs with grated Parmesan in the third bowl. This combination of textures will ensure an eye-catching golden crust.
With everything prepped, you can confidently move on to each step. This approach streamlines the preparation, keeping it easy and enjoyable.
Perfecting Crispy Dill Pickle Parmesan Chicken
Technique
Once your chicken is marinated and your breading station is ready, the cooking begins. Heat your skillet over medium heat, adding enough oil to create a small layer on the bottom. Testing the oil temperature is crucial; sprinkle in a breadcrumb to see if it sizzles. This step ensures a beautifully crispy exterior without any mushy spots.
Dredge each chicken breast into the seasoned flour first, coating it evenly. Shake off any excess to avoid a clumpy texture. Next, dip the floured chicken into the egg mixture, letting it soak up the moisture. Finally, coat it with the breadcrumb-Parmesan blend, pressing lightly to ensure a thorough coverage.
When placing the chicken in the oil, do so carefully to avoid splatter. Cooking for 5 to 7 minutes on each side yields a golden brown crust. Monitoring closely allows you to capture that perfect moment just before overcooking occurs.
Tips/tricks
To achieve the best results, avoid overcrowding the skillet. Cooking fewer pieces at a time promotes better heat distribution, allowing for even cooking and a crispy finish. If you have more chicken to fry, consider cooking in batches.
For an extra crunch, double-dip the chicken. After the breadcrumb layer, return the chicken to the egg wash and coat with breadcrumbs again. This trick creates an even thicker golden crust for a satisfying crunch that adds to the experience.
Furthermore, remember to let the chicken rest after frying. Allow it to sit for about 5 to 10 minutes to help lock in the juiciness, ensuring each bite remains tender.
Troubleshooting and Variations
Perfecting results
Getting the desired crispy result involves paying attention to details. If the chicken doesn’t turn golden brown, your oil may not be hot enough. Adjusting the temperature slightly can make all the difference. Conversely, if the oil is too hot, the crust may burn before the chicken reaches the safe internal temperature of 165°F (75°C).
Also, if you’re finding that the breading is falling off, make sure to pat the chicken dry before dredging it in flour. Any excess moisture can cause the breading to slide off during frying.
Variations
Feel free to play with seasonings in the flour and breadcrumb mixture. A touch of cayenne pepper or Italian herb mix can customize the flavor to suit your taste preferences. Consider adding some shredded cheese to the breadcrumb mixture for an even cheesier experience.
Veggie lovers can even try this preparation method with eggplant or zucchini for a delightful vegetarian option. The crispy breading pairs well with those veggies too!
Serving and Storage of Crispy Dill Pickle Parmesan Chicken
Serving/presentation
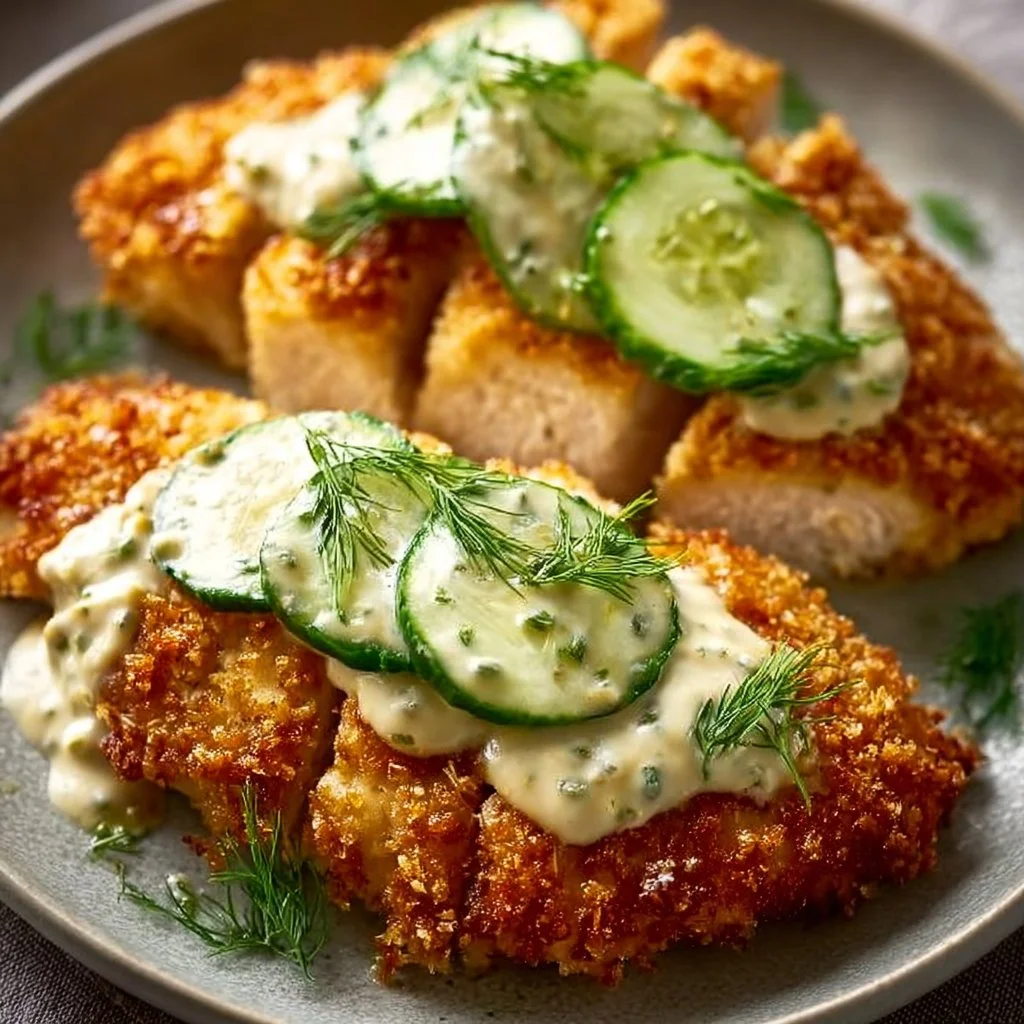
Serving Crispy Dill Pickle Parmesan Chicken can be as simple or elaborate as you wish. Present the chicken on a large platter garnished with fresh herbs like parsley or dill for a pop of color. This visual addition enhances the dish, making it more appealing for gatherings.
Pair with sides such as a fresh salad, crispy fries, or creamy coleslaw to round out your meal. The crunchiness of the chicken complements these sides, creating a perfectly balanced dinner plate.
Pairings/storage
This chicken pairs wonderfully with a variety of sides and sauces, elevating the overall meal experience. Try serving it with tangy ranch dressing for dipping or add a slice of buttery garlic bread. Consider serving a side of pickles or even some corn on the cob for a nostalgic touch.
If you have leftovers, store the chicken in an airtight container in the refrigerator for up to 3 days. To maintain that crispy texture, reheat in an oven rather than a microwave. Simply place in a preheated oven at 375°F (190°C) for about 10-15 minutes until heated through.
Creating this Crispy Dill Pickle Parmesan Chicken is easier than you may think. This recipe not only brings flavors together beautifully but also creates moments around the dinner table that your family will cherish. Get ready to impress everyone with this unforgettable meal!
Print
Crispy Dill Pickle Parmesan Chicken
- Prep Time: 15 minutes
- Cook Time: 15 minutes
- Total Time: 30 minutes
- Yield: 4 servings
- Category: Main Course
- Method: Frying
- Cuisine: American
- Diet: None
Description
A delightful crispy chicken recipe marinated in dill pickle juice, packed with flavor from seasoned breadcrumbs and Parmesan cheese.
Ingredients
- 4 boneless, skinless chicken breasts
- 1 cup dill pickle juice
- 1 cup all-purpose flour
- 1 tsp garlic powder
- 1 tsp onion powder
- 1 tsp paprika
- 1 tsp salt
- 1/2 tsp black pepper
- 2 large eggs
- 1 cup seasoned breadcrumbs
- 1/2 cup grated Parmesan cheese
- Oil for frying
Instructions
- Marinate chicken breasts in dill pickle juice for at least 1 hour, preferably overnight.
- Set up a breading station with three bowls: 1 for seasoned flour, 1 for whisked eggs, and 1 for breadcrumb-Parmesan mixture.
- Dredge each chicken breast in the seasoned flour, then dip in the egg, and finally coat with breadcrumb mixture.
- Heat oil in a skillet over medium heat and add the chicken breasts carefully.
- Cook for 5 to 7 minutes on each side or until golden brown and cooked through (165°F/75°C).
- Remove from skillet and let rest for 5 to 10 minutes before serving.
Notes
For extra crunch, consider double-dipping the chicken in the egg wash and breadcrumbs. Serve with your favorite sides and dipping sauces.
